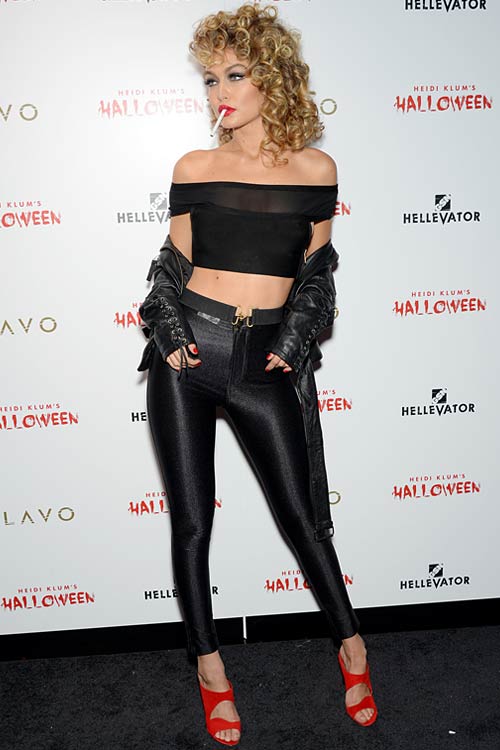
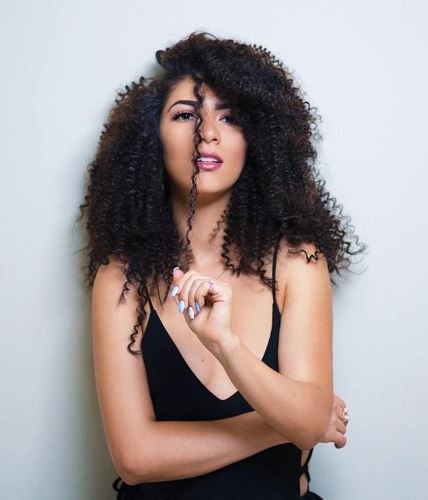
Afro inspired pencil curls look exactly as fun as they sound! They’re very trendy right now and the best part? They’re so easy to make! Here are 5 tutorials to make them – with and without heat! So pick your fave way!

Pencil curls are the tight, even curls that are done by twirling your hair around a pencil, giving the effect of an Afro head. They resemble the Type 4 hair. And they’re are gravitating all the attention in the fashion scene lately. The diva dresser Diana Ross curls are having a major comeback this year all the way from the 80s after they were seen in Paris Fashion Week SS2019.

But you can also make bigger, bouncier pencil curls by using different methods and tools.

Whether you’re just looking to trying out the bouncy curls for a date or wanna have some fun at a girls slumber party, we’ve got you covered on how you can get that springy mane. In many different ways, too!
How to Get Pencil Curls on Natural Hair
All you straight hair chic girls, grab a large of some mocktail to hydrate yourself during the long hours of curling.

All you Need:
Tangle teaser
Bunch of wooden pencils
Strips of foil paper
Heat protectant spray
Hair straightening iron
TONI&GUY Curl Sculpting Spray
If you don’t seem to get enough of your straightening irons already then here’s another way to put them to use.
• First, it’s best to detangle your hair and section them into 4.
• Spray, spray, spray some heat protectant.
• Then start off by taking a small piece of hair and begin wrapping it around the pencil. You can choose for a thicker or slimmer pencil depending on how tight you want your curls to be.
• Keep in mind to always avoid plastic pencils, as you’re going to be working with heat in the next couple of steps and I’m sure you don’t want melted plastic to style your hair.
• Once you’ve wrapped the hair, cover it up with a strip of aluminium foil to avoid direct heat contact.
• Then hold your straightener over it for just a few seconds to work its and magic and there you have your chic and on fleek pencil curls.
• Go ahead and finish the rest of your hair and end it a setting spray to hold the curls in place.
How to Make Pencil Curls with Curling Wands

Paddle Brush
Curling Wand
Heat Protectant Spray
Setting Spray
CHOPSTICK curlers from Lee Stafford/ Corioliss Style Stick Super Slim Curling Wand ( 7-10 mm Curls)
• Make sure your hair is freshly washed and not greasy. Rub some Heat protecting serum onto your palms and into the lengths of your hair. Brush your hair and remove all the knots, this will help fluff up your hair and give it more volume and also distribute the product evenly.
• Start from the very beginning of your hair to make it appear more natural.
• Section your hair into quadrants and clip them up. Take out one portion and further section it into smaller strips as you go ahead with curling.
• Take smaller sections of hair for a tighter curl and larger sections for a more loose curl.
• Work your hair from bottom up, and commence wrapping them around the hot rods. Hold them in place for a couple seconds.
• Make sure you unwind your hair and not pull the wand off because your hair can get stuck.
• As you reach the crown , you want your curls to be smaller so pick up smaller sections of hair, and make the curl go away from your face at the crown so it doesn’t fall flat onto your face.
• Once you’re done with your whole head of hair, run your fingers through the curls, and loosen the curls at the roots to evoke natural beauty.
• Then spray some hair spray. Roughly brush the roots of your hair with a teasing brush and also separate a few curls with your finger individually so you get more volume and fluff up the curl ball head.
How to Get Pencil Curls with No Heat
You will Need:
Detangle Brush
Plumping Hair Mousse
Leave in Conditioner
Salt Spray
Rubber Bands
Bendy Straws
View this post on Instagram
Gorgeou straw curls by @sherrymaldonado 🙀😻😻 #hairvids #hairstyle #hairtutorial #curls #strawcurls
• Start with wet hair. Detangle your hair with a tangle teaser.
• Prep your hair a with a bit of texture using a plumping hair mousse.
• Then put on some leave-in conditioner to moisturise those curls. It’ll help hold your curls well too.
• Then spray some salt spray, you could do this in the beginning or after you curl your mane.
• Section your hair, start by taking a small section and rolling it around the center of the straw. Fold over the two loose ends and secure it with an elastic band.
• Roll your hair in the direction you want it to fall, for example, whether center parted or side parted , so its easier to tame them.
• Slip on a satin cap and and sleep on your hair and wait for the magic to happen.
• Pull the loose end and the straw and the band will pop out.
Pencil Curls Tutorial Without Heat (Option 2 – Chopsticks)
Bamboo skewer for tight mini curls.
You can follow the same steps and swap the bendy straw for a bamboo skewer to achieve more tight, small curls.
If you find them uncomfortable to sleep with, then just do this process in the morning after your shower and at night, voila! Ready to party!
Unwrap, and unwind the curls and let them take their shape.
Acing those perfectly tiny curls sounds more than a little daunting, rest assured that these tutorials make it oh-so-simple to pull off the popular look. It lasts for about 2-3 days depending on the nature of your hair. Let us know which one you liked.

Shilpa Ahuja the editor-in-chief of ShilpaAhuja.com, which she founded with the goal of inspiring confidence in the modern working woman through fashion. Other than defining the direction of the magazine, she also writes about fashion & beauty trend forecasts, industry analysis, and opinions.
Shilpa’s work has been published in the University of Fashion blog and Jet Airways magazine. She is also an artist, illustrator and cartoonist. She is also the creator of Audrey O., a comic series that represents the lifestyle of millennial women. She enjoys creative writing and world travel. Her art has been exhibited at Harvard Graduate School of Design and the Aroma Hotel, Chandigarh and been published in Chandigarh Times.
Originally from Chandigarh, Shilpa also has a degree in architecture and has worked in interior project management. She is also the author of the book “Designing a Chinese Cultural Center in India”. Shilpa has a Masters in Design Studies degree from Harvard University.
For feedback and questions, please email [email protected].


What is the 6 picture(glass use girl) modellr name